Learn calligraphy: A beginners guide to dip pen calligraphy (+ FREE practice worksheets)

If you’ve ever felt drawn to the art of beautiful writing but didn’t know where to begin, you’re not alone. My mission is to make your beginning calligraphy journey clear, enjoyable, and inspiring.
Why learn calligraphy?
Did you know that over 60% of people who start creative hobbies like calligraphy find it helps reduce stress and anxiety?¹ Calligraphy isn’t just about making pretty letters. It’s a creative outlet that offers relaxation, mindfulness, and a satisfying sense of accomplishment.
When I first started calligraphy, I was completely overwhelmed. I didn’t understand the differences between nibs, inks, or pen holders, and I wasn’t sure how to even hold the pen correctly. I eagerly tried to copy the intricate work of experienced calligraphers, but my letters looked nothing like theirs. Frustration quickly set in, and at times I felt like giving up altogether.
What kept me going was the calming, almost meditative effect that writing by hand had on me. That quiet time with my pen helped me push through those early challenges. With patience and consistent practice, I gradually improved. What started as a stressful attempt to learn a new skill eventually blossomed into a fulfilling passion — and now, calligraphy is my main career.
Whether you want to send heartfelt handwritten cards, decorate your home with personalized art, or even start a creative career, calligraphy gives you a way to express yourself beautifully.
Essential tools to get started
Starting calligraphy may seem overwhelming because of all the different tools available, but you only need a few beginner-friendly supplies to get going:
Nibs: I recommend the Zebra G nib for beginners. It’s flexible enough to create lovely thick and thin strokes but forgiving enough not to discourage you while learning.
Pen Holders: There are two main types — straight and oblique. Both work well, but an oblique holder can help maintain the proper angle and reduce wrist strain.
Inks: Sumi ink or Walnut ink are great beginner options. They flow smoothly and give beautiful results. (Find out my favourite sumi and walnut inks in this article)
Paper: Choose smooth, bleed-proof paper like Rhodia pads or high-quality printer paper to protect your nib and make practicing easier.
For a deeper dive into the tools you need, check out my post The tools you need for pointed pen calligraphy.
Did you know you can get my FREE calligraphy worksheets now?
Subscribe to my newsletter and get instant access!
The nib
Understanding how the nib works is essential for a confident start in your calligraphy journey.
Preparing your nib
Before writing, it’s important to prepare your nib. Nibs come coated with oil to prevent rusting, so you’ll want to clean them gently — a quick scrub with a bit of rubbing alcohol or window cleaner works wonders. This ensures your ink adheres properly. I keep a small spray bottle with window cleaner on my desk for convenience.
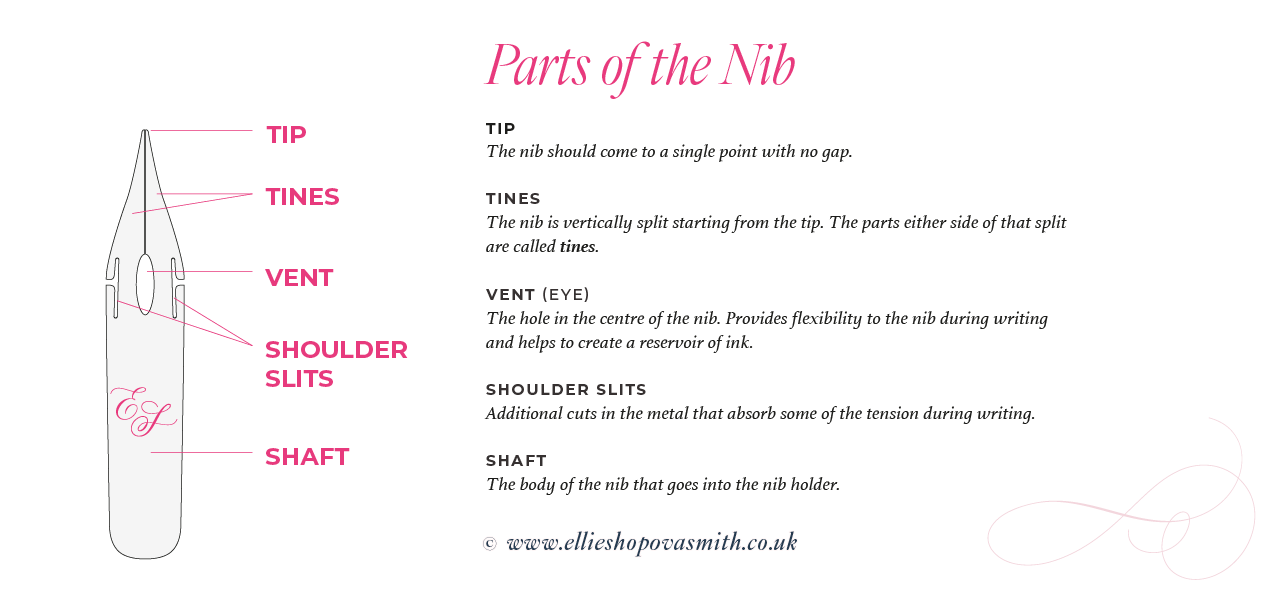
Nib anatomy
Tip: The nib should come to a single point with no gap.
Tines: Your nib is vertically split starting from the tip. The parts either side of that split are called tines. In resting position there should be no gap between the two tines.
Vent (eye): The hole in the centre of the nib. Different brands may have different shape vent. The purpose of the vent is to provide some flexibility to the nib during writing. It also helps to create a reservoir for of ink due to the surface tension of the liquid.
Shoulder slits: Smaller additional cuts in the metal that absorb some of the tension during writing and prevent the metal from bending with use.
Shaft: The body of the nib that goes into the nib holder. This is usually where the brand of your nib is stamped into the metal.
How the nib works – thick and thin lines
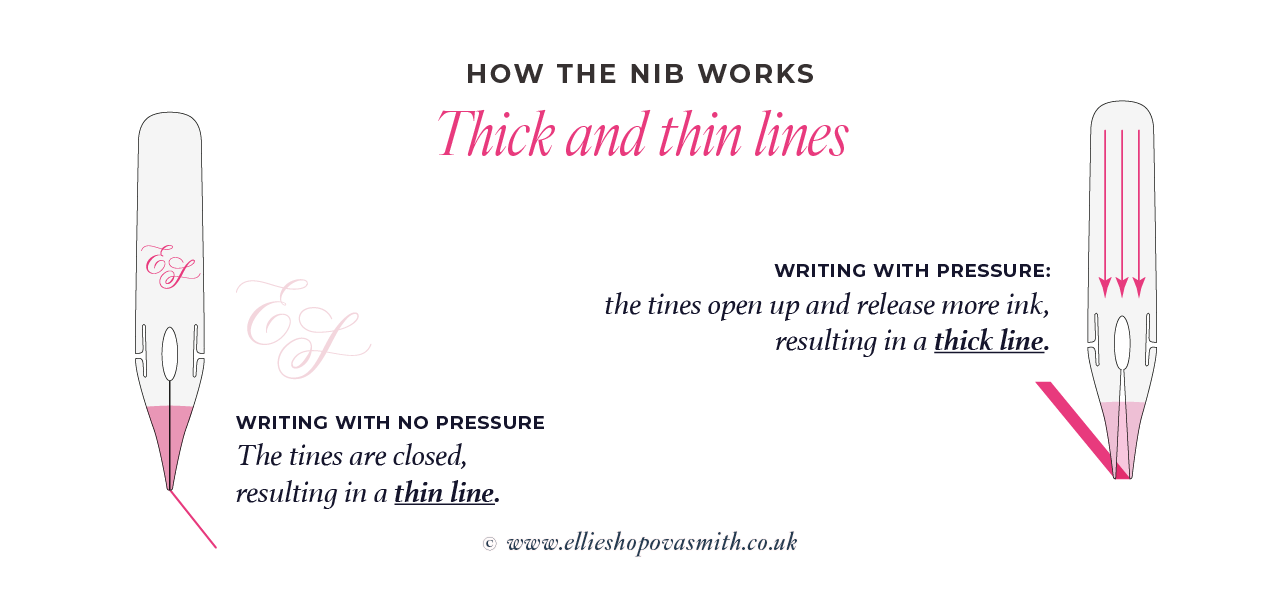
The smooth flow between thick and thin lines is perhaps what makes calligraphy so enchanting. But how do you know when to write thick and when thin lines? There is one simple rule to follow – write a thin line on the up-strokes, and a thick line on the down-strokes.
This is due to the how your nib works – to create a thick line you need to apply pressure as you write. If you try to do this on an up-stroke your nib will dig into the paper.
To write a thin line simply glide the nib over the paper with no pressure. For a thick line you must apply some pressure (on a down-stroke). This will make the tines of the nib open and more ink will be released on the page… Ta-daa, you have a thick line!
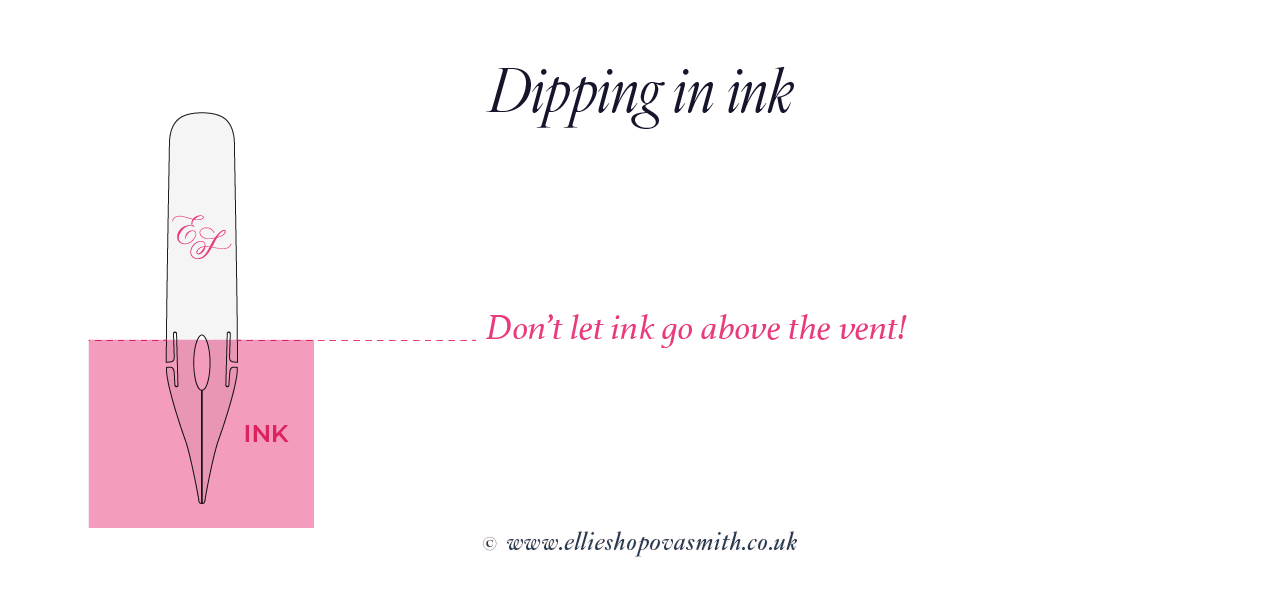
When dipping the nib in ink don’t let ink go above the vent of the nib!
Dipping the nib in ink
Dip your nib just past the oval hole in the nib to hold the perfect amount of ink. Too little ink means frequent dipping; too much can cause blots on your paper. Gently swipe the nib against the rim of your ink jar to remove any excess ink.
Holding the pen for calligraphy
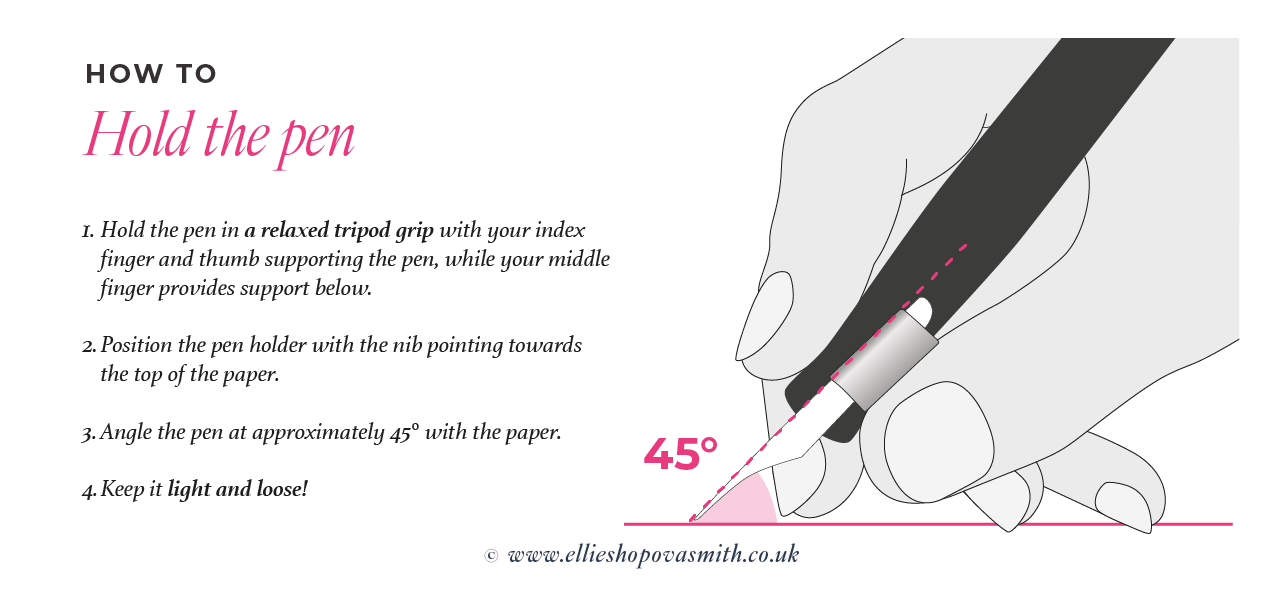
Holding your pen correctly makes a huge difference. There are three main things to remember:
Hold your pen at about a 45-degree angle to the paper.
Keep the nib’s vent hole facing straight up, never sideways.
Align your nib parallel to your writing’s slant line — try rotating your paper to get comfortable.
Keep the hold light and don’t squeeze the pen tightly!
Basic calligraphy strokes and letterforms
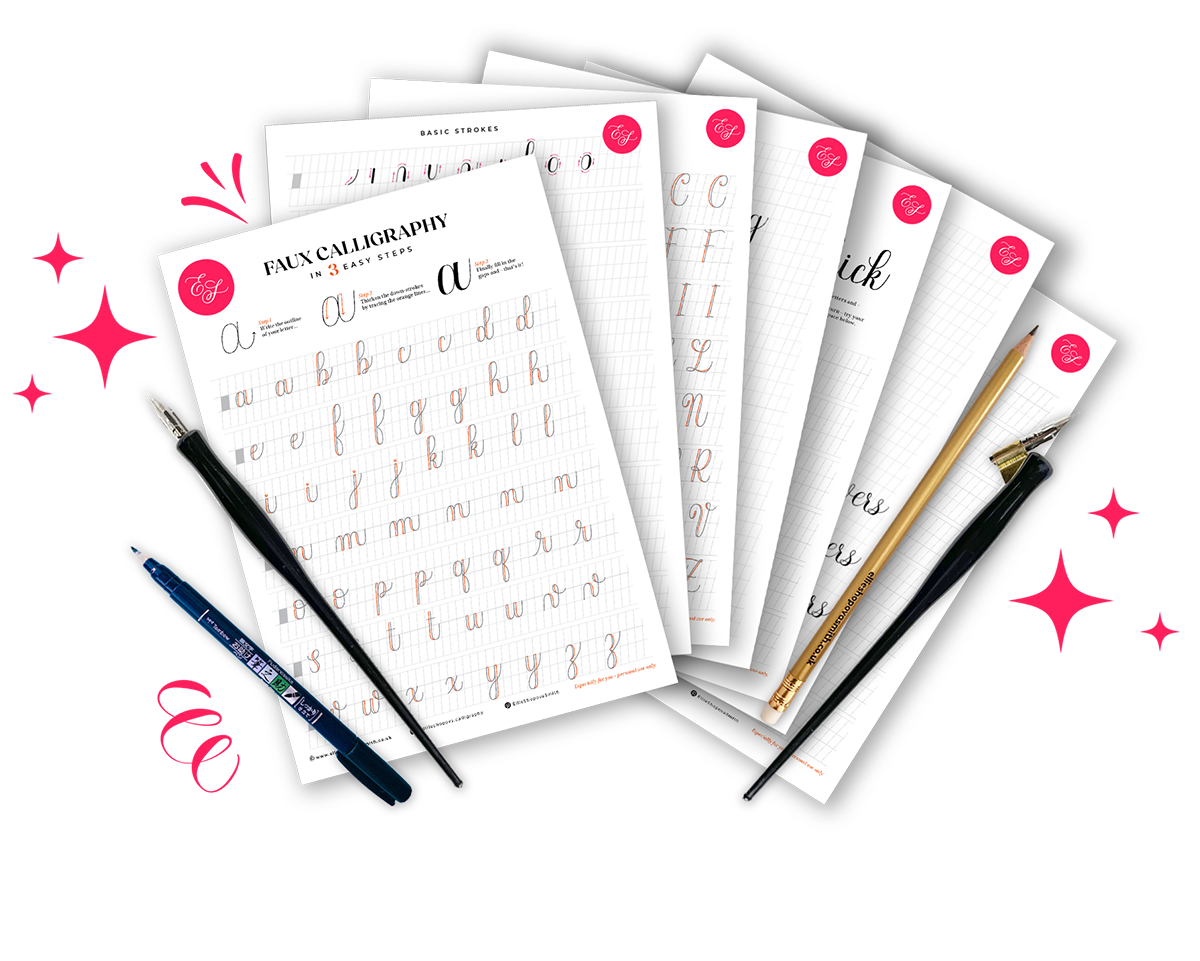
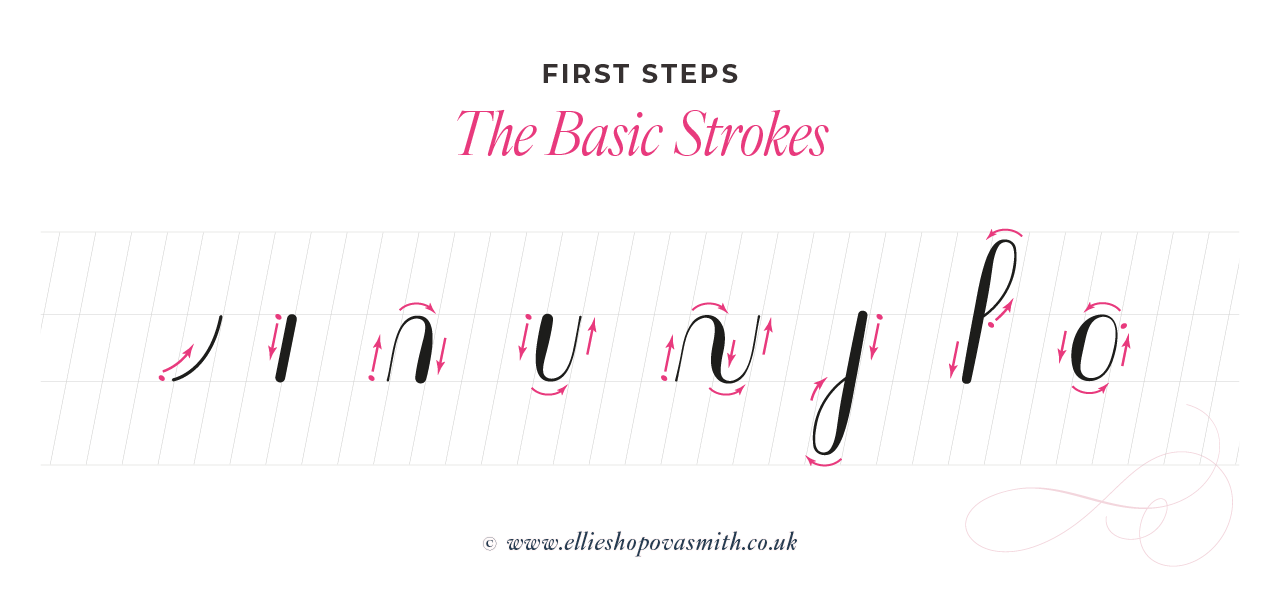
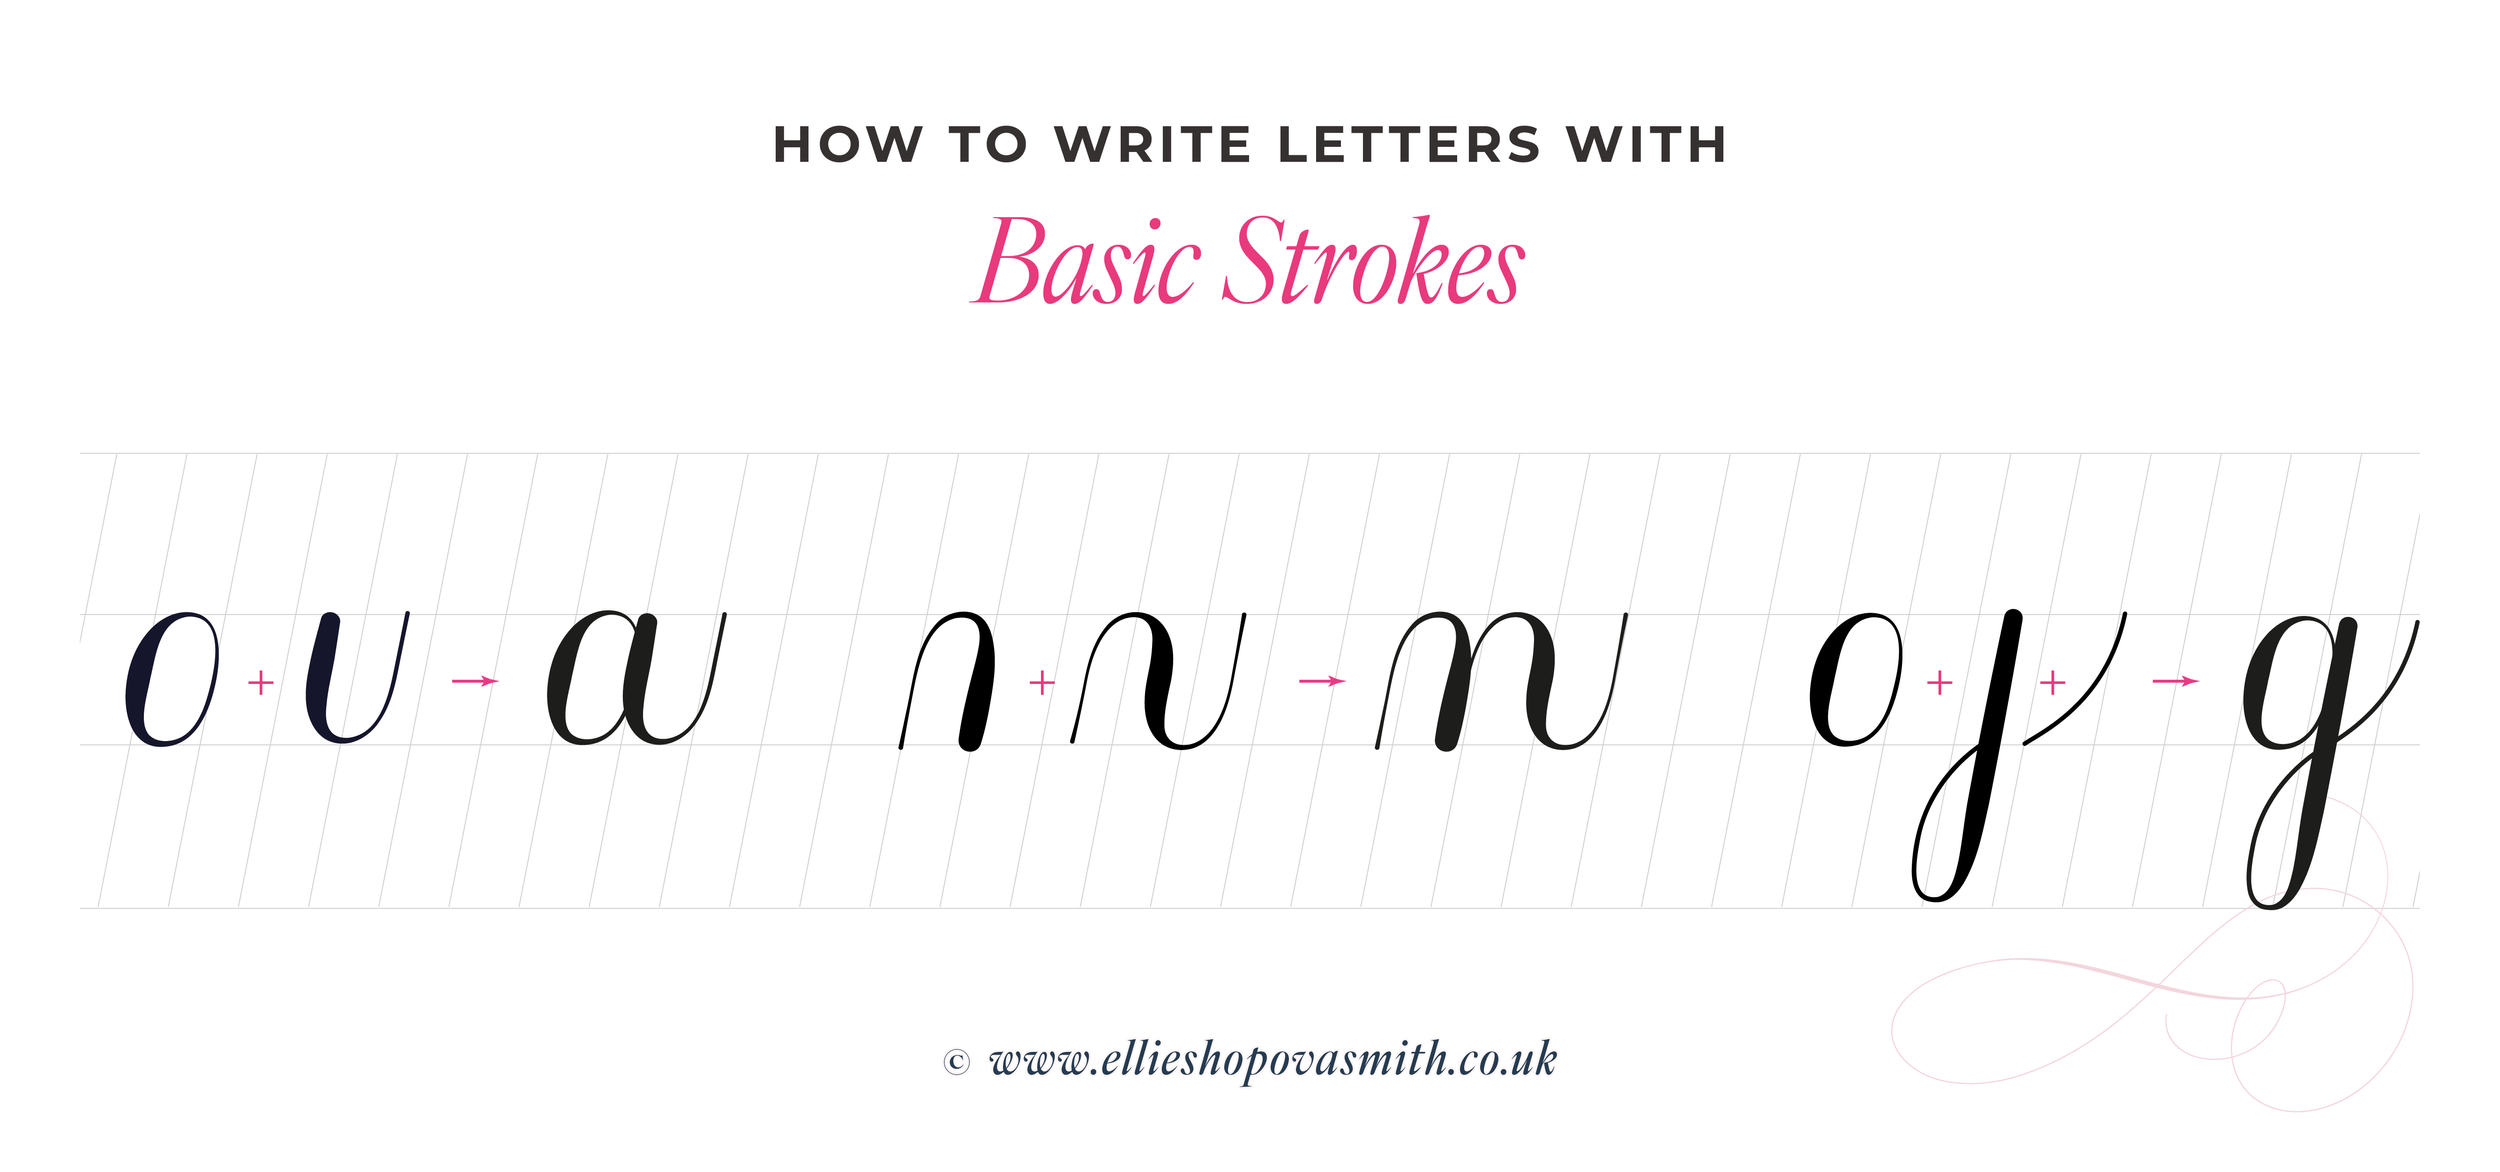
All lower case calligraphy letters are built from simple strokes. This was the biggest revelation for me when I started learning calligraphy. Start by practicing these basic shapes — underturns, overturns, ovals, and compound strokes, ascenders and descenders — to build muscle memory and control. Once you’re comfortable, combine these strokes to form letters.
You can download my free calligraphy worksheets to guide your practice and help you develop beautiful, consistent letterforms. You can get instant access here: Free Calligraphy Worksheets. These worksheets make practicing structured and fun!
Once you are confident writing letters you’ll be ready to start writing words. This is easy – in most cases the exit stroke of the first letter becomes the entrance stroke of the letter that follows.
Perhaps the most important thing to observe when connecting letters is to keep a consistent spacing between your letters!
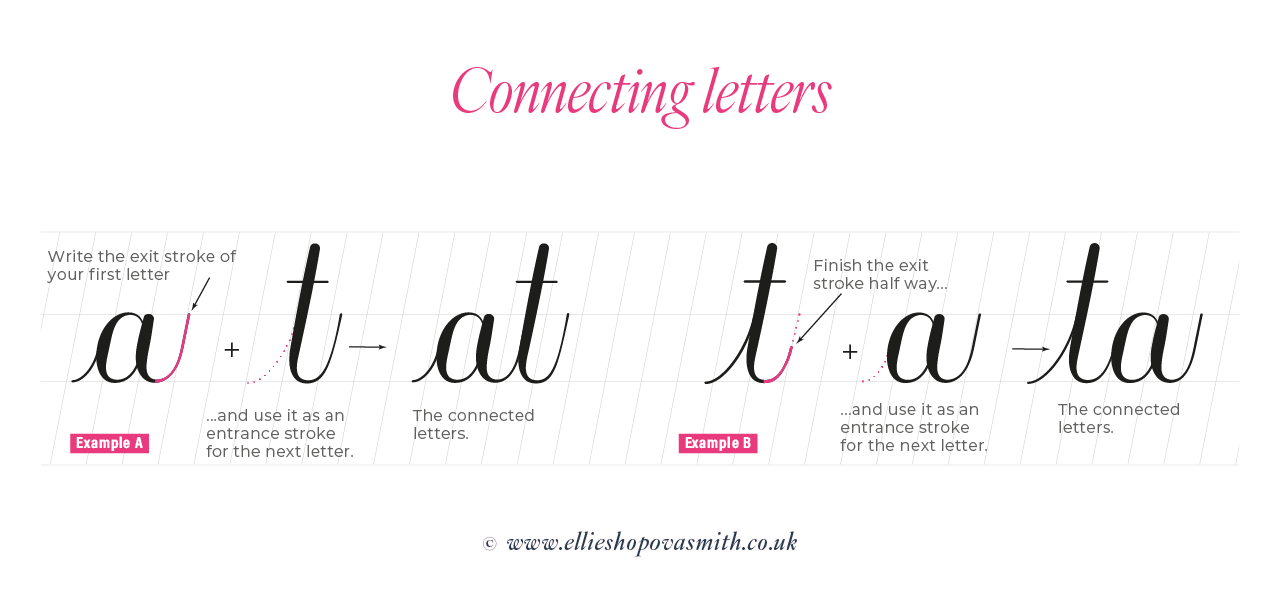
Connecting letters into words: two scenarios.
Practice tips to keep you motivated
Set aside just 10-15 minutes daily – or as often as you can – for intentional practice. Focus on each letterform carefully and don’t rush. Writing out quotes, poems, or song lyrics can keep your sessions interesting and meaningful.
Remember, improvement takes time. Frustration is part of the learning process — even experienced calligraphers face challenges. Celebrate your progress, no matter how small, and keep practicing.
Learn through making – this is by far the best way to learn and build your confidence in the process. Think of small projects you can make with calligraphy – from greeting cards to wall art there are endless possibilities.
Additional resources
To support your journey, consider joining online communities or forums where beginners share tips and inspiration — learning alongside others keeps motivation high.
Professional organisations
CLAS
In the UK CLAS offers one of the most respected calligraphy learning pathways, from beginner courses to advanced qualifications. www.clas.co.uk/
IAMPETH
In the USA IAMPETH is dedicated to the preservation and promotion of handwriting arts. On their website and through the annual membership calligraphers and enthusiast from across the globe can access variety of classes, resources, support and inspiration www.iampeth.com/
Workshops
Workshops are the best way to get all your questions answered with personalised tuition to get you started on your calligraphy journey with confidence and clarity. Look for experienced tutors in a calligraphy style that appeals to you. If you are in the North of England you might be able to join one of my in-person workshops. You can check the current class schedule here: www.ellieshopovasmith.co.uk/workshops
Local groups
Calligraphy interest groups are a great way to connect with other calligraphy enthusiasts in your area and develop your skills together. The members are usually a mix of very experienced calligraphers to newbies but are always welcoming and very supportive of new members. My local group is Calderdale Calligraphers. Search online or in your local library for information on groups in your area.
Conclusion
Every expert calligrapher started exactly where you are now. With patience, practice, and the right tools, you can create stunning calligraphy and enjoy the calming benefits of this timeless art. Embrace your journey with joy and curiosity!
Feel free to explore more posts and resources on my blog to deepen your skills and discover new creative possibilities.
¹ Source: American Art Therapy Association, 2023